 Products Home
Optics Cleaning Fixture Kits

- Holds Optics During the Cleaning Process
- Ideal for Cleaning Optics Prior to Insertion into a Mount
- Two Models Hold Optics up to Ø1.77" or Ø3.00"
SCL03-Based Kit
Clean Optics from Ø0.15" to Ø1.77"
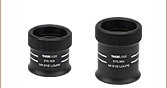
FCF3
Specially Designed Fingers Hold
Optics for Cleaning
SCL04-Based Kit
Clean Optics from Ø0.15" to Ø3.00"


Please Wait

Features
- Optics Cleaning Fixture Based on Standard Components
- Specially Designed Delrin®* Fingers Hold Optics
- Two Versions for Various Optic Sizes:
- SCL03(/M) Holds Optics from Ø0.15" (Ø3.8 mm) to Ø1.77" (Ø45.0 mm)
- SCL04(/M) Holds Optics from Ø0.15" (Ø3.8 mm) to Ø3.00" (Ø76.2 mm)
- Ideal for Cleaning Optics Using the "Drop and Drag" Method
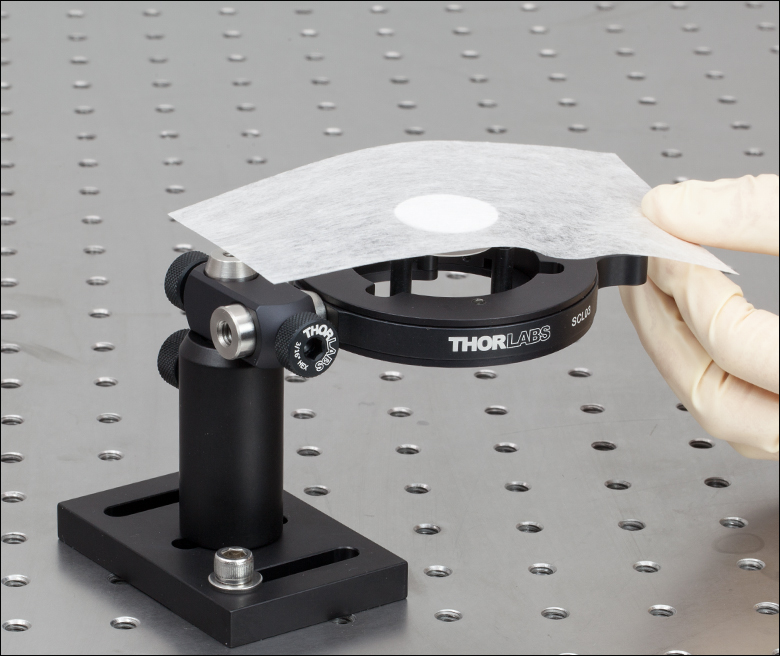
Thorlabs' Optics Cleaning Fixture Kits are designed for holding an optic during a cleaning process, freeing both hands to focus on proper cleaning technique. Each kit is designed using standard Thorlabs optomechanical components. The key piece of the fixture is one of our self-centering lens mounts [SCL03(/M) or SCL04(/M)], which are designed to allow for the quick insertion and removal of optics during cleaning. The standard Delrin mounting fingers on the SCL03(/M) and SCL04(/M) secure the front face of the optic below the edge of the fingers. These fingers can be swapped out and replaced with our specially designed FCF3 fingers, which hold optics at least 1.5 mm thick, so that the surface of the optic is above the surface of the mount. This is ideal for using the "Drag and Drop" method of cleaning where a solvent-moistened lens tissue is carefully dragged across the optic, although folded tissue and forceps may also be used.
The other components in our cleaning fixture kits are standard Ø1/2" posts, post holders, bases, and clamps. All of the pieces of the kit are sold as individual components, allowing you to only buy the components of the kit that you do not already own. The only items not provided with the fixture kits are 1/4"-20 (M6) cap screws for securing the base to the post holder and securing the base to an optical table. If you do not have these screws, Thorlabs offers 1/4"-20 and M6 cap screw kits.
Step-by-step instructions for assembling the optics cleaning fixture kit may be found on the Assembly tab above. Specific instructions for using the fixture with the "Drop and Drag" cleaning method may be found on the Cleaning tab. Our general cleaning recommendations, including alternate methods of cleaning, may be found in our Optics Cleaning Tutorial.
Please note that this page is set up to make it easy to order the complete cleaning fixture kit or to remove components from your order that you already own. For specific instructions on ordering the items on this page, please read the information contained within the shaded green box above each ordering area.
*Delrin is a registered trademark of DuPont Polymers, Inc.
Assembling the Optics Cleaning Fixture
| Needed Components and Tools | |
|---|---|
| Imperial Components | Metric Components |
| Imperial Optics Cleaning Fixture Kit | Metric Optics Cleaning Fixture Kit |
| 1, 3/8" Long 1/4"-20 Cap Screw* | 1, 10 mm Long M6 Cap Screw* |
| 2, 1/4" Washers* | 2, M6 Washers* |
| 2, 1/4"-20 Cap Screws for Securing the Base to the Optical Table or Breadboard* | 2, 1/4"-20 Cap Screws for Securing the Base to the Optical Table or Breadboard* |
| 3/16" Balldriver | 5.0 mm Balldriver |
*Thorlabs does not offer screws and washers separately; however, we do offer 1/4"-20 and M6 cap screw kits, which also contain an assortment of washers.
The optics cleaning fixture kit is designed around standard components that many researchers may already have in their labs. The items sold on this page are Thorlabs' recommendations; substitutions (e.g., slightly longer posts than recommended) can be used if desired. Here, we will refer to the recommended components only. If you have any questions about the suitability of a substitution, please contact Tech Support.
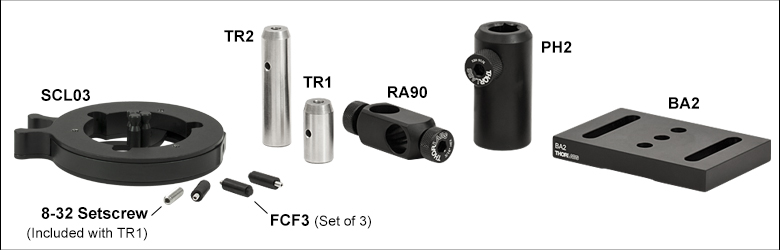
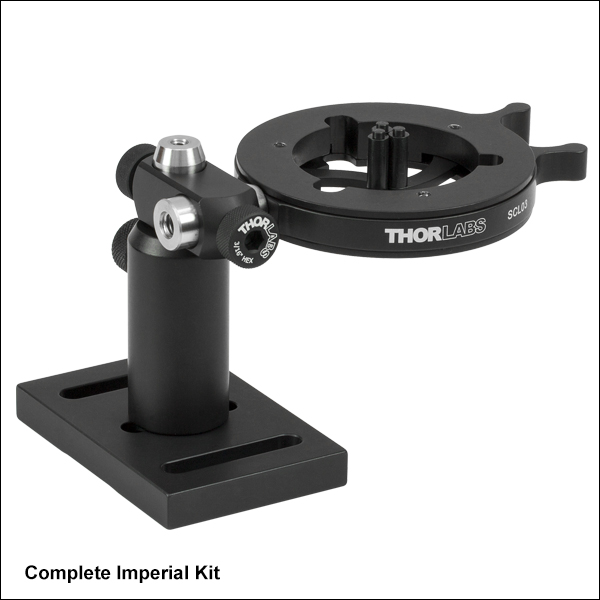
Figure 2.1 The complete Imperial Optics Cleaning Fixture kit for Ø0.15" (Ø3.8 mm) to Ø1.77" (Ø45.0 mm) optics prior to assembly is shown in the image above. Items shown from left to right: SCL03, an 8-32 setscrew (included with the TR1 post), FCF3 set of three cleaning fingers, TR2 2" tall post, TR1 1" tall post, RA90 right-angle clamp, PH2 2" tall post holder, and BA2 post holder base.
The following photos and steps refer to our Imperial kit for Ø0.15" to Ø1.77" optics, which is based on the SCL03 self-centering lens mount. The procedure, however, is the same for kits based on the SCL04 self-centering mount and/or metric kit counterparts.
Click to Enlarge
Figure 2.2 Unscrew the standard clamping fingers.

Click to Enlarge
Figure 2.3 Attach the FCF3.
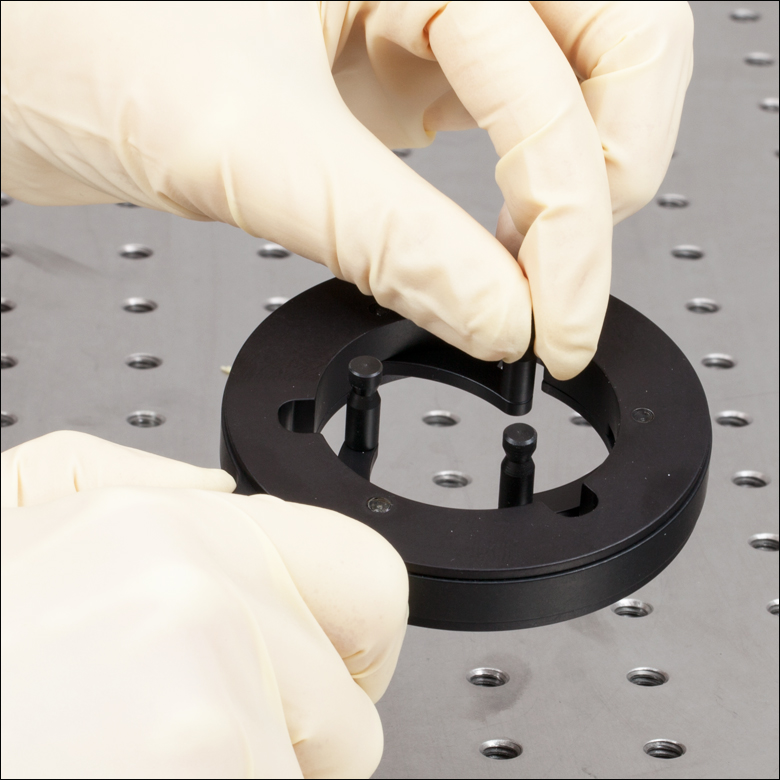
Step 1: Attach the FCF3 to the Lens Mount
Remove the Delrin® fingers from the SCL03 by opening the clamp slightly and unscrewing the fingers. Now, screw on each FCS3 finger, as shown in Figure 2.2.
Click to Enlarge
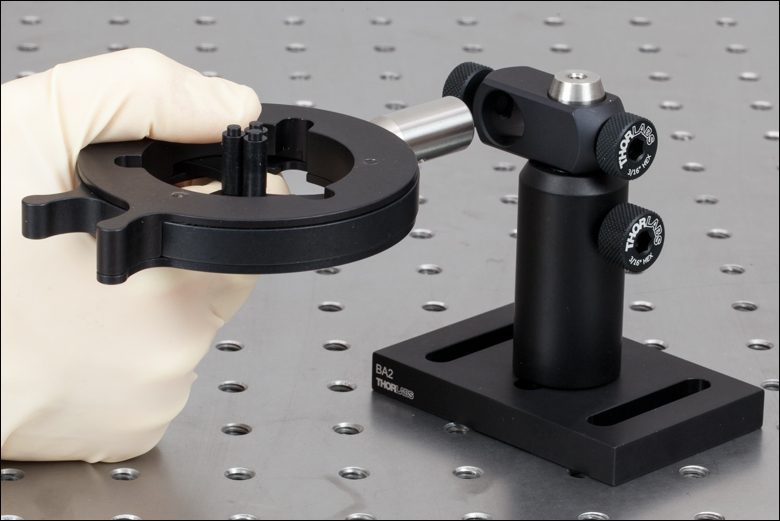
Figure 2.4 Attach the SCL03 to the 1" post.
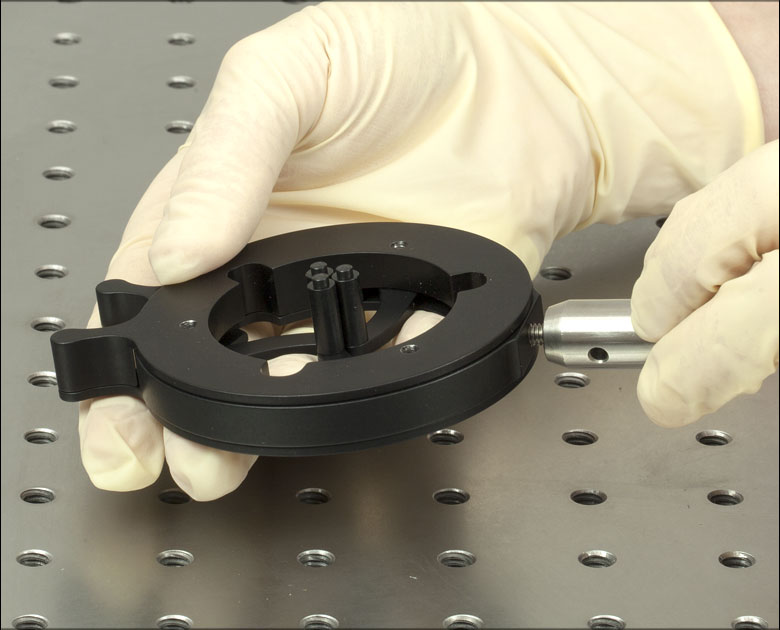
Step 2: Attach the Lens Mount to the Post
Attach the SCL03 mount to the 1" long Ø1/2" post using the 8-32 set screw provided with the post. (The TR30/M Ø1/2" post used in the metric kits includes the appropriate metric M4 screw.)
Click to Enlarge
Figure 2.5 Attach the post holder to the base.
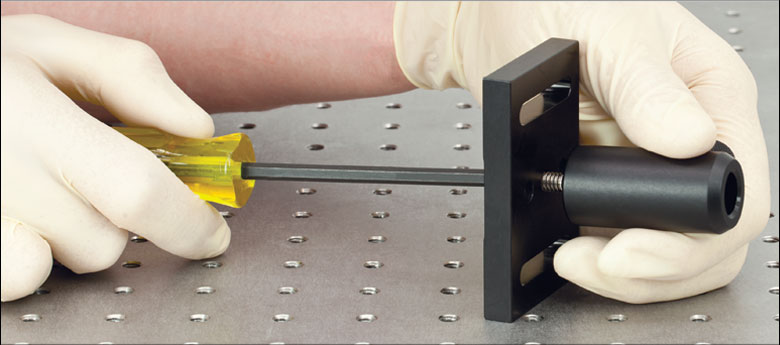
Step 3: Attach the Base to the Post Holder
Using a 3/8" long 1/4"-20 screw (not provided) and a 3/16" balldriver, attach the BA2 base to the PH2 post holder.
Click to Enlarge
Figure 2.6 Insert the post into the post holder.
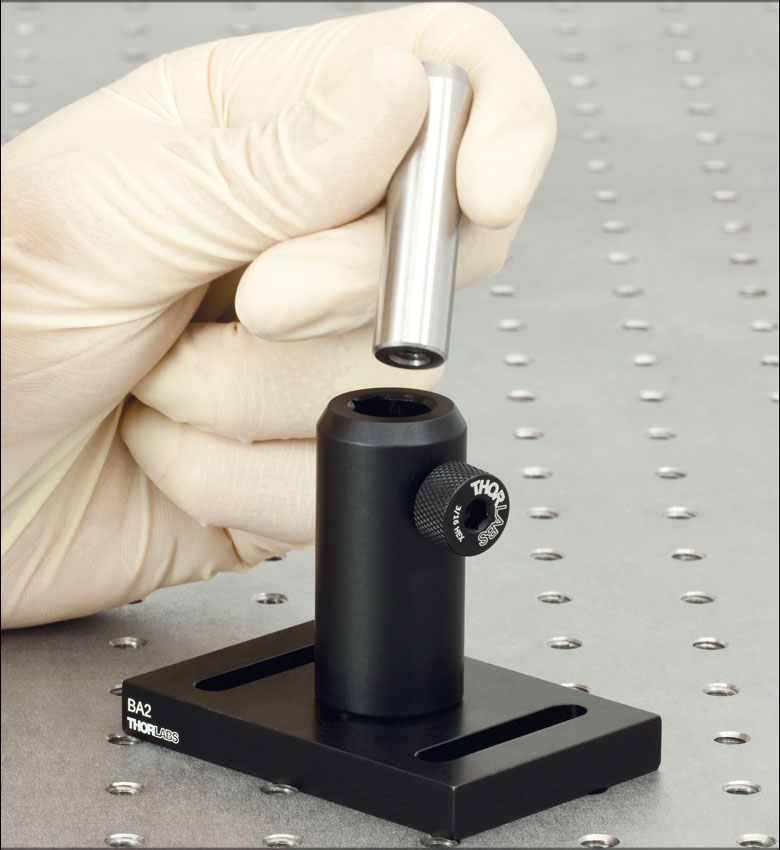
Step 4: Insert the Post into the Post Holder
Insert the TR2 into the PH2 so that approximately 3/4" (19 mm) of the post is sticking out of the post holder. Tighten the thumbscrew. If desired, use the 3/16" balldriver to fully tighten the thumbscrew.

Click to Enlarge
Figure 2.7 Attach the right angle clamp.
Step 5: Attach the Right-Angle Clamp
Slide the RA90 right-angle clamp over the end of the TR2 post, and tighten the thumbscrew. If desired, use the 3/16" balldriver to fully tighten the thumbscrew.
Click to Enlarge
Figure 2.8 Attach the optic mount assembly.
Step 6: Insert the Optic Mount Assembly into the Base Assembly
Slide the TR1 post into the open end of the RA90 clamp, and tighten the thumbscrew, using the 3/16" balldriver if needed to fully tighten the screw.
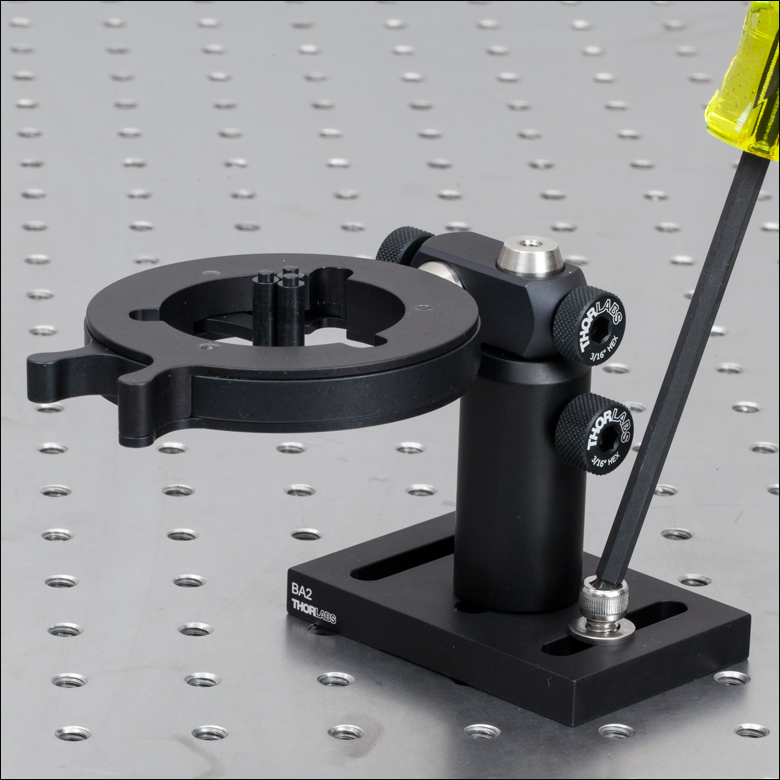
Click to Enlarge
Figure 2.9 Bolt the fixture to the table.
Step 7: Secure the Cleaning Fixture to an Optical Table or Breadboard
It is recommended that the cleaning fixture be secured to an optical table or breadboard to minimize the chance of breaking optics. Using a 1/4"-20 screw of an appropriate length for your breadboard and a 1/4" washer, secure the base to the table, ideally using one screw in each slot.
The optics cleaning fixture is now complete. For recommended cleaning procedures, please see the Cleaning tab.
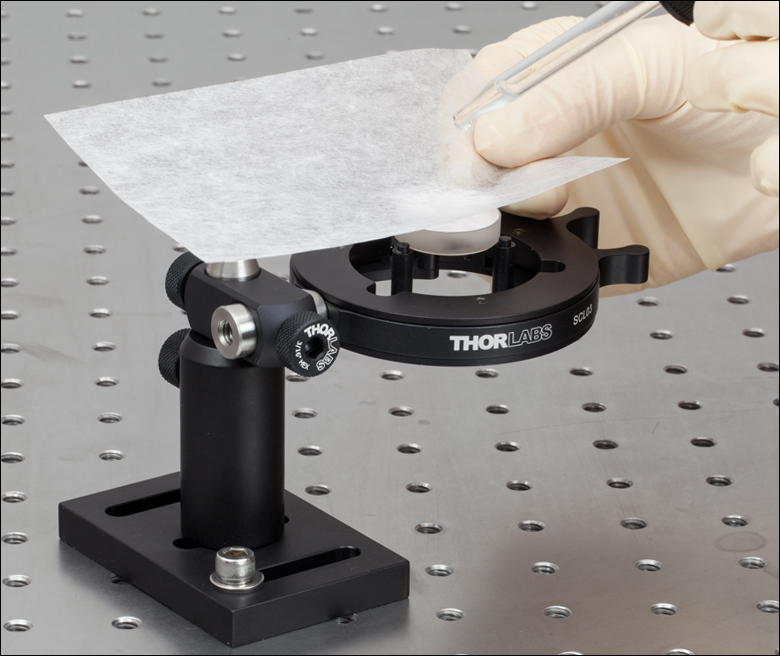
Click to Enlarge
Figure 3.2 Apply a drop or two of solvent to moisten the tissue.
Click to Enlarge
Figure 3.3 Drag the tissue across the optic.
Cleaning Optics with a Cleaning Fixture Kit
The design of the optics cleaning fixture makes it ideal for holding optics while using the "Drop and Drag" method of cleaning, which is demonstrated here. For other cleaning techniques, please see our Optics Cleaning and Handling Tutorial.
Step 1: Inspect the Optic
First, inspect the optic to determine the location of the contaminants. This allows you to orient the optic in the fixture so that the contaminant is lifted from the surface of the optic as soon as possible instead of being dragged across the surface of the optic.
Step 2: Insert the Optic into the Fixture
Squeeze the actuator tabs on the self-centering lens mount, and insert the optic. The drop and drag method is ideal for flat optical surfaces, such as mirrors, and the FCF3 fingers are designed to hold optics greater than 1.5 mm thick. Be sure that the optic is seated properly with the underside resting on the wider part of the fingers.
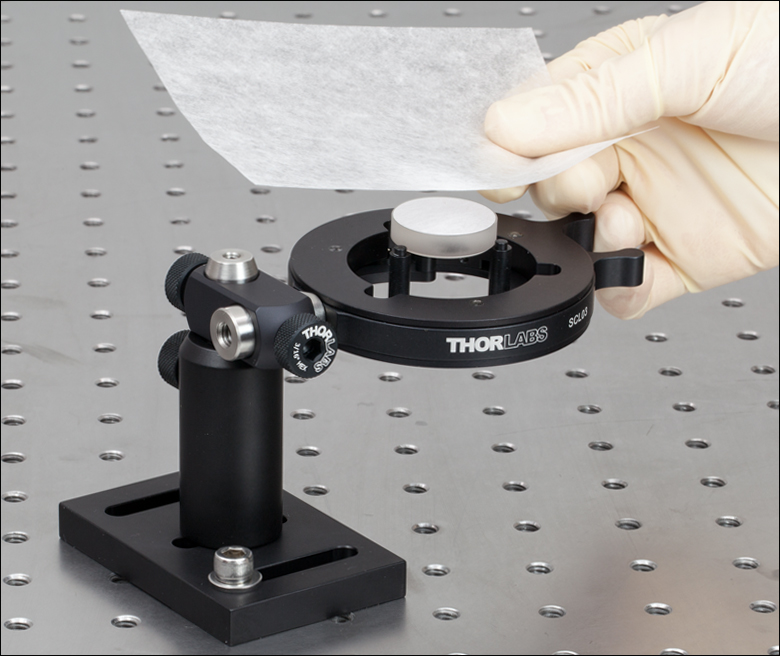
Step 3: Clean the Optic
Take a fresh, clean sheet of lens tissue and hold it above (not in contact with) the optic so that as you pull the lens tissue it will be drawn across the optical surface. Next place one or two drops of an approved quick-drying solvent on the lens tissue being held above the optic. The weight of the solvent will cause the lens tissue to come into contact with the optical surface. Slowly but steadily drag the damp lens tissue across the optic being careful not to lift the lens tissue off of the surface. Continue dragging the lens tissue until it is fully off of the optical surface.
The correct amount of solvent will keep the lens tissue damp for the entire drag but not leave any visible trace of solvent on the optical surface after the drag is finished. Inspect the optic and repeat if necessary, but only use each sheet of lens tissue once. This cleaning method is preferred by many since the lens tissue is only in light contact with the optical surface. This method can be used successfully to remove small adhered particles and oils from an optical surface. Heavy concentrations of contaminants often require repeated treatments.
| Posted Comments: | |
user
(posted 2021-01-15 09:14:06.9) I often need to clean phase plates that are 1/2’ in diameter and about 0,7mm thick. It is a pain, maybe you have something to offer? Or there are plans to upgrade this optics holder system? YLohia
(posted 2021-01-22 02:33:31.0) Thank you for your feedback. Unfortunately, we don't have any options at the moment for that application or an upgrade in the pipeline. We will consider adding a version of the FCF3 that can accommodate thinner optics to our catalog in the future. J Bianca Jackson
(posted 2019-08-12 14:33:51.79) The "Tweezers and Forceps" hotspot needs to be updated because the page that it links to does not feature forceps. tcampbell
(posted 2019-08-12 04:35:26.0) Hello, thank you for contacting Thorlabs. We have updated this Related Items link with text and an image that better represent the items on the destination page. |

 Zoom
Zoom
Click to Enlarge
Figure G1.1 Cleaning Fixture with Ø1" Mirror
| Recommended Kit Components* | ||
|---|---|---|
| Item # | Description | Qty. |
| FCF3 | Optics Cleaning Fingers for SCL03, Pack of 3 | 1 |
| SCL03 | Self-Centering Optic Mount | 1 |
| RA90 | Right-Angle Post Clamp, Fixed 90° | 1 |
| TR1 | Ø1/2" x 1" Optical Post | 1 |
| TR2 | Ø1/2" x 2" Optical Post | 1 |
| PH2 | 2" Tall Post Holder | 1 |
| BA2 | Post Holder Base, 2" x 3" x 3/8" | 1 |
* Please note that the SCL03 will not work for cleaning optics without the purchase of the replacement FCF3 fingers. Other components, such as the base, post holder, and posts may be substituted for similar components. For example, longer posts may be used. Please see the Assembly tab above for a list of common lab supplies not included with the kit.
To order the complete Optics Cleaning fixture kit in the recommended quantities, please click the "Add Kit" button at the bottom of the Ordering Area. If you desire to remove an item from the kit (for example, if you already own the component), simply change the value in the "QTY" box to 0. Quantities of a given item may also be increased. Once you have adjusted the quantities, press the "Add Kit" button to upload all of the requested products to your shopping cart at once.

 Zoom
Zoom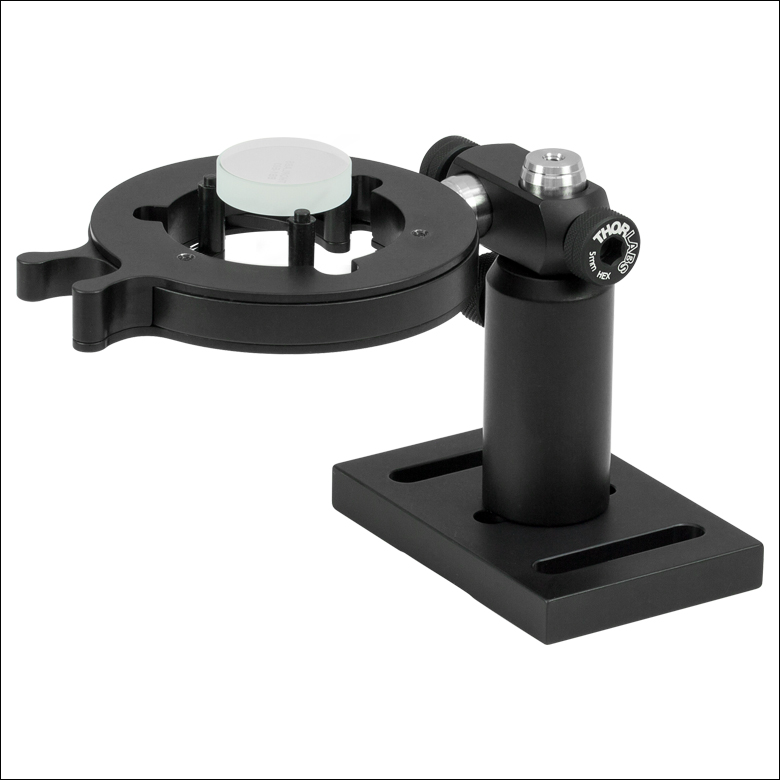
Click to Enlarge
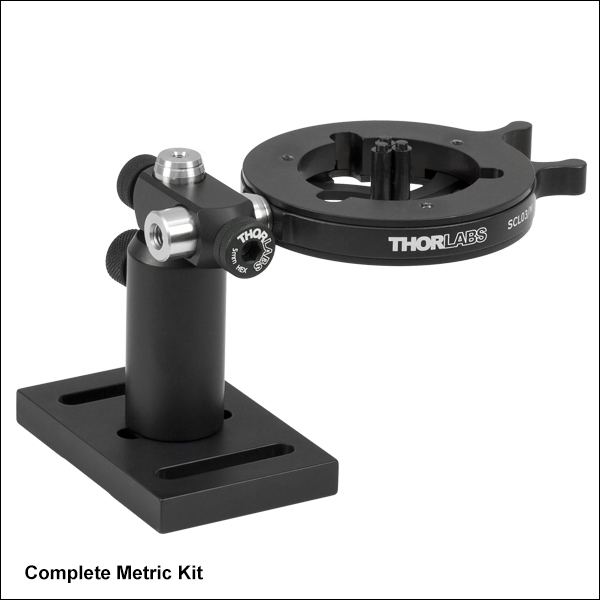
Figure G2.1 Cleaning Fixture with Ø1" Mirror
| Recommended Kit Components* | ||
|---|---|---|
| Item # | Description | Qty. |
| FCF3 | Optics Cleaning Fingers for SCL03, Pack of 3 | 1 |
| SCL03/M | Self-Centering Optic Mount | 1 |
| RA90/M | Right-Angle Post Clamp, Fixed 90° | 1 |
| TR30/M | Ø1/2" x 30 mm Optical Post | 1 |
| TR50/M | Ø1/2" x 50 mm Optical Post | 1 |
| PH50/M | 50 mm Tall Post Holder | 1 |
| BA2/M | Post Holder Base, 50 mm x 75 mm x 10 mm | 1 |
* Please note that the SCL03/M will not work for cleaning optics without the purchase of the replacement FCF3 fingers. Other components, such as the base, post holder, and posts may be substituted for similar components. For example, longer posts may be used. Please see the Assembly tab above for a list of common lab supplies not included with the kit.
To order the complete Optics Cleaning fixture kit in the recommended quantities, please click the "Add Kit" button at the bottom of the Ordering Area. If you desire to remove an item from the kit (for example, if you already own the component), simply change the value in the "QTY" box to 0. Quantities of a given item may also be increased. Once you have adjusted the quantities, press the "Add Kit" button to upload all of the requested products to your shopping cart at once.

 Zoom
Zoom
Click to Enlarge
Figure G3.1 Cleaning Fixture with Ø2" Mirror
| Recommended Kit Components* | ||
|---|---|---|
| Item # | Description | Qty. |
| FCF3 | Optics Cleaning Fingers for SCL04, Pack of 3 | 1 |
| SCL04 | Self-Centering Optic Mount | 1 |
| RA90 | Right-Angle Post Clamp, Fixed 90° | 1 |
| TR1 | Ø1/2" x 1" Optical Post | 1 |
| TR2 | Ø1/2" x 2" Optical Post | 1 |
| PH2 | 2" Tall Post Holder | 1 |
| BA2 | Post Holder Base, 2" x 3" x 3/8" | 1 |
* Please note that the SCL04 will not work for cleaning optics without the purchase of the replacement FCF3 fingers. Other components, such as the base, post holder, and posts may be substituted for similar components. For example, longer posts may be used. Please see the Assembly tab above for a list of common lab supplies not included with the kit.
To order the complete Optics Cleaning fixture kit in the recommended quantities, please click the "Add Kit" button at the bottom of the Ordering Area. If you desire to remove an item from the kit (for example, if you already own the component), simply change the value in the "QTY" box to 0. Quantities of a given item may also be increased. Once you have adjusted the quantities, press the "Add Kit" button to upload all of the requested products to your shopping cart at once.

 Zoom
Zoom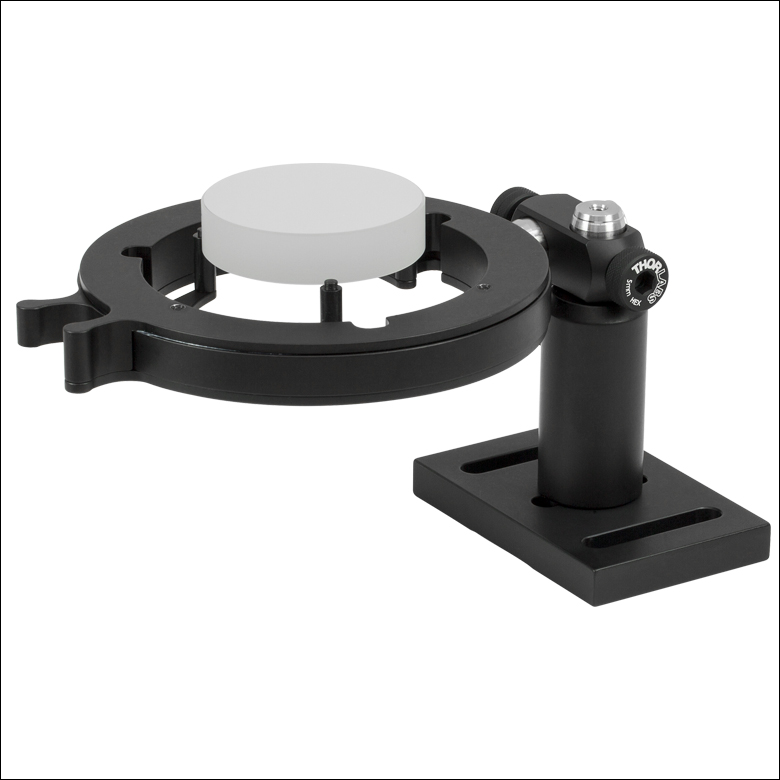
Click to Enlarge
Figure G4.1 Cleaning Fixture with Ø2" Mirror
| Recommended Kit Components* | ||
|---|---|---|
| Item # | Description | Qty. |
| FCF3 | Optics Cleaning Fingers for SCL04, Pack of 3 | 1 |
| SCL04/M | Self-Centering Optic Mount | 1 |
| RA90/M | Right-Angle Post Clamp, Fixed 90° | 1 |
| TR30/M | Ø1/2" x 30 mm Optical Post | 1 |
| TR50/M | Ø1/2" x 50 mm Optical Post | 1 |
| PH50/M | 50 mm Tall Post Holder | 1 |
| BA2/M | Post Holder Base, 50 mm x 75 mm x 10 mm | 1 |
* Please note that the SCL04/M will not work for cleaning optics without the purchase of the replacement FCF3 fingers. Other components, such as the base, post holder, and posts may be substituted for similar components. For example, longer posts may be used. Please see the Assembly tab above for a list of common lab supplies not included with the kit.
To order the complete Optics Cleaning fixture kit in the recommended quantities, please click the "Add Kit" button at the bottom of the Ordering Area. If you desire to remove an item from the kit (for example, if you already own the component), simply change the value in the "QTY" box to 0. Quantities of a given item may also be increased. Once you have adjusted the quantities, press the "Add Kit" button to upload all of the requested products to your shopping cart at once.